
I Installed Arch Linux on Bare Metal
The real lesson started after the install
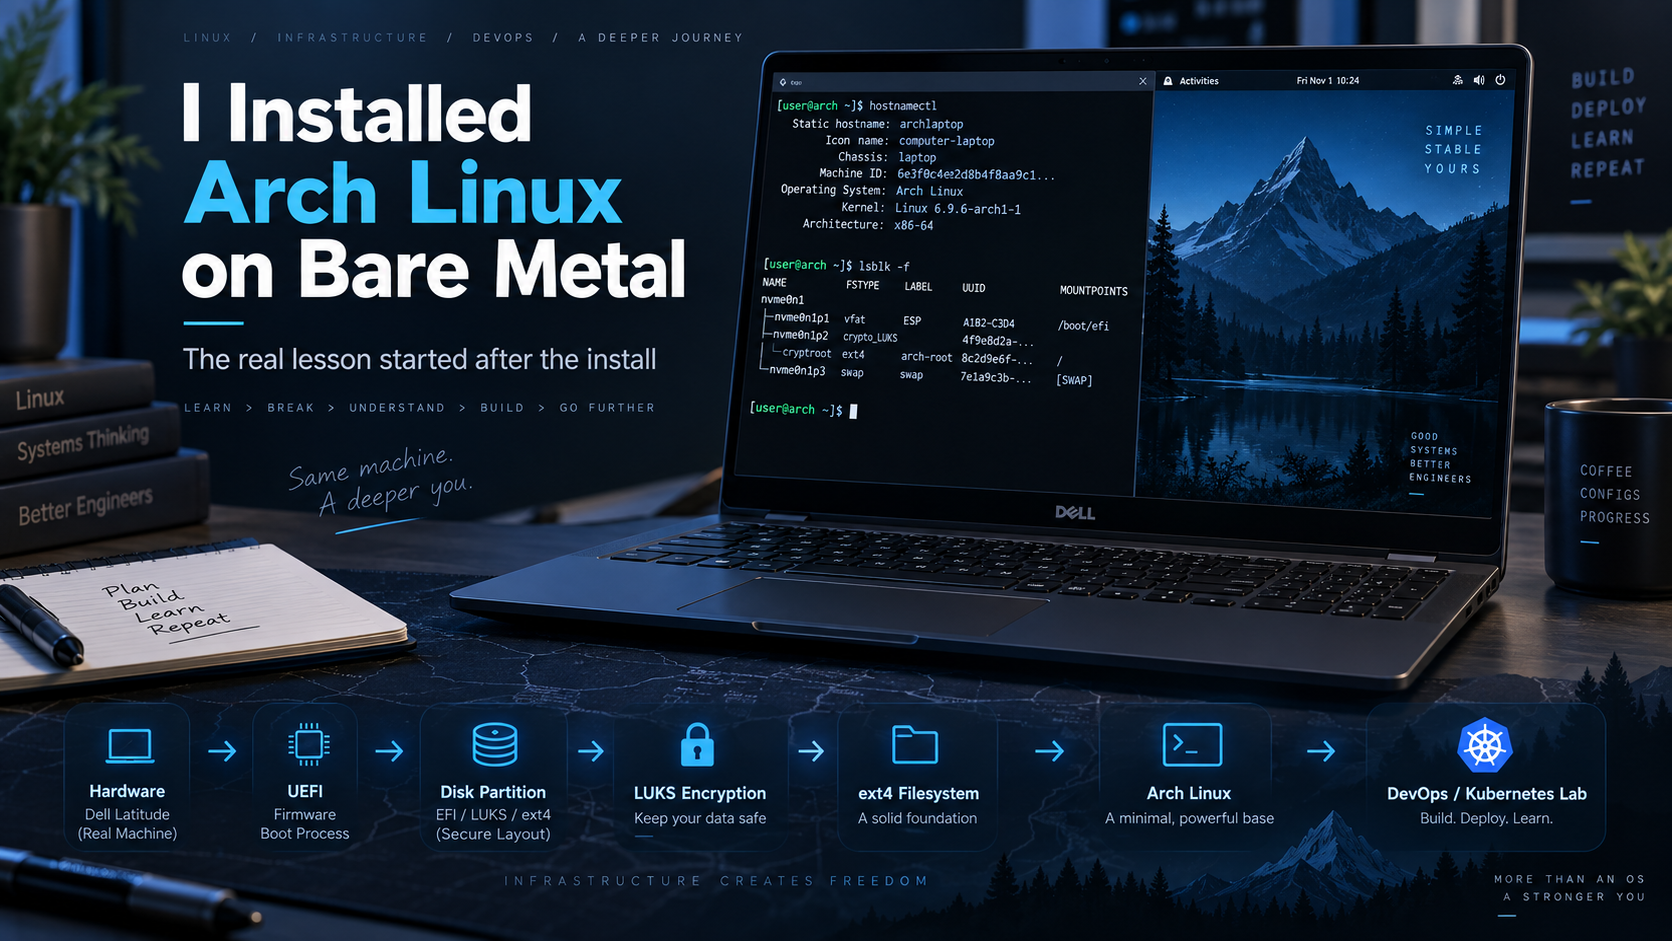
I recently turned a Dell Latitude 5490 into a dedicated Arch Linux machine for Linux, DevOps, Kubernetes, and homelab learning.
Not a VM.
Not a cloud instance.
A real bare-metal installation.
The goal was not just to say, “I installed Arch.”
The real goal was to get closer to the operating system and understand the layers that modern infrastructure quietly depends on.
Because the more I work with Linux, containers, Kubernetes, and DevOps tooling, the more I realize something:
Infrastructure confidence starts when the layers underneath stop feeling like magic.
Why I chose bare metal
I already practice a lot with containers, Kubernetes labs, and virtual environments.
Those are great.
But I wanted a dedicated machine where I could learn Linux closer to the metal.
A place where I could understand booting, disks, partitions, encryption, filesystems, services, networking, and system configuration more intentionally.
So I used an old Dell Latitude 5490 and turned it into an Arch Linux learning machine.
The goal was simple:
Build a system I can break, fix, rebuild, and understand deeply.
Preparing the machine
Before installing Arch, I had to handle a few important things.
I confirmed the laptop was using UEFI.
I disabled Secure Boot.
I made sure Windows BitLocker was fully decrypted before wiping the disk.
I verified the Arch ISO checksum before creating the USB installer.
Then I booted into the Arch live environment.
Even before the actual installation started, the process already reminded me that Linux learning is not just about commands.
It is also about understanding the machine you are working with.
The first real problem: Wi-Fi refused to cooperate
One of the first issues I hit was with the Intel Wi-Fi adapter.
The adapter initially failed to load correctly and showed an iwlwifi error with code -110.
At first, it would have been easy to assume:
“The driver is broken.”
Or:
“I need to reinstall something.”
But this became one of the first useful lessons from the whole process.
Not every Linux issue is solved by blindly reinstalling packages.
Sometimes the issue is hardware state.
After troubleshooting and doing a full cold power cycle, the Wi-Fi adapter appeared correctly and networking started working.
That small moment taught me something important:
Linux troubleshooting is not just about knowing commands. It is about slowing down, observing the system, and understanding what state the hardware and software are actually in.
Installing Arch with archinstall
For the first installation, I used archinstall.
I know Arch is famous for manual installation, but I intentionally started with archinstall because I wanted to get a working system first, then study what had happened underneath.
The installation included:
Full Windows disk wipe
EFI boot partition
LUKS2 encryption for the main Linux partition
ext4 root filesystem
zram swap
COSMIC desktop environment
NetworkManager
Linux kernel
Africa/Nairobi timezone
Normal user with sudo access
After the installation, the machine booted successfully into Arch Linux.
That was the first win.
But the more important part came after.
Verifying the installed system
After first boot, I did not want to just assume everything was fine.
I checked the system properly.
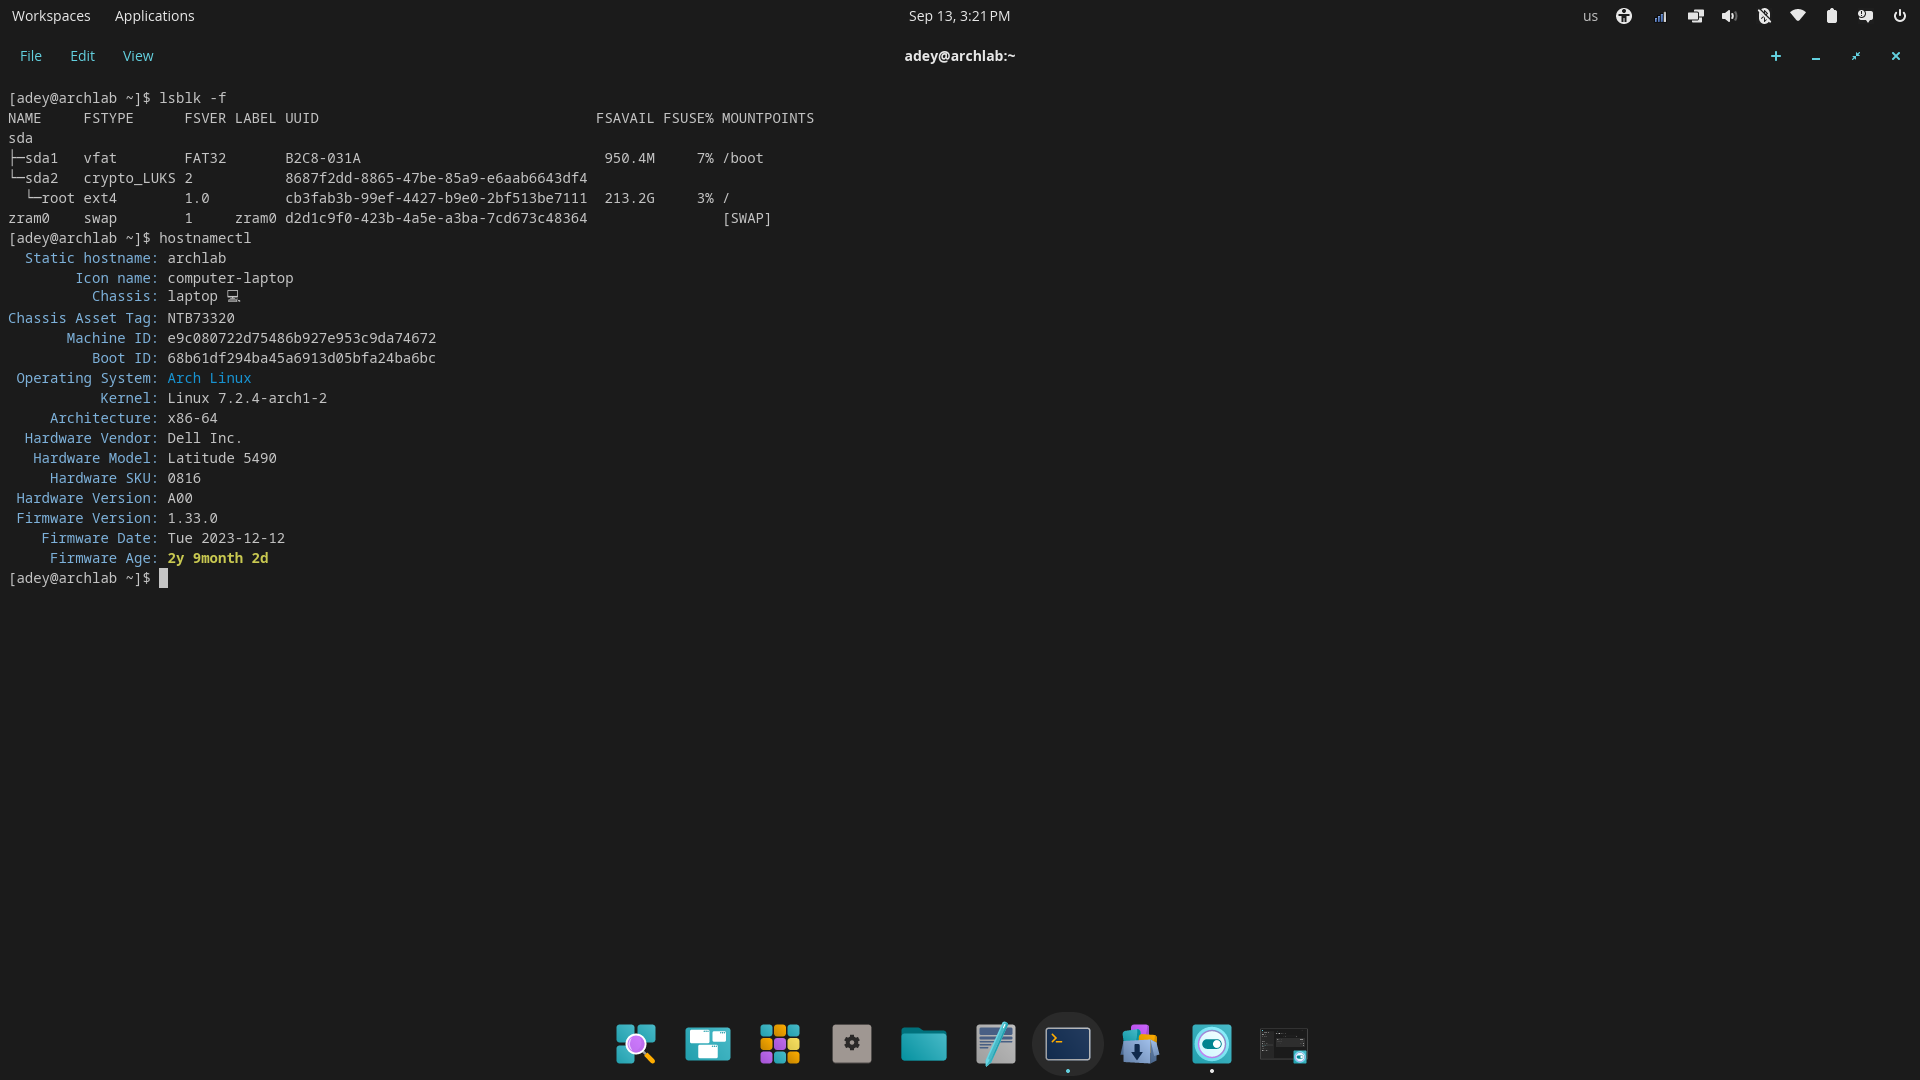
I verified the disk layout with:
lsblk -f
Arch Linux bare-metal install showing the encrypted LUKS root layout and system details from lsblk -f and hostnamectl.
I checked Wi-Fi connectivity.
I tested internet access with:
ping
I checked the timezone with:
timedatectl
I checked failed systemd services with:
systemctl --failed
I also confirmed sudo access for my normal user.
The system came up healthy with zero failed units.
At that point, the machine was working.
But I still wanted to understand the installation beyond “it boots.”
The storage model started to click
The current machine roughly looks like this:
SSD
├── EFI /boot
└── LUKS2
     └── ext4 /
That may look simple, but there is a lot of learning inside it.
The mental model became:
disk
→ partition
→ encrypted container
→ unlocked device
→ filesystem
→ mount point
→ bootable operating system
This was one of the biggest learning shifts for me.
Before, I could say words like “partition,” “encryption,” “filesystem,” and “mount point.”
But installing Arch made me respect the order and relationship between them.
A disk is not the same as a partition.
A partition is not the same as a filesystem.
A LUKS container is not the same as the unlocked device.
A mounted filesystem is not the same as the block device underneath it.
Once those layers start making sense, Linux storage stops feeling like a confusing pile of names.
It becomes a stack.
Learning the AUR workflow
After getting Arch running, I also wanted to understand the Arch package ecosystem better.
So I installed yay manually from the Arch User Repository.
The process looked like this:
git clone https://aur.archlinux.org/yay.git
cd yay
makepkg -si
That helped reinforce the difference between:
Official Arch repositories
AUR packages
Building packages with
makepkg
After that, I used yay to install Brave Browser successfully.
This was another useful lesson.
On many systems, installing software feels like a simple one-line command.
But Arch makes you more aware of where software comes from, how it is built, and what responsibility you carry when installing packages from community sources.
Updating the system and adding core tools
I also ran a full system update:
sudo pacman -Syu
Then I installed and verified some essential tools for my Linux and DevOps workflow:
Git
GitHub CLI
curl
wget
jq
Neovim
tmux
rsync
unzip
These tools may look basic, but they are the daily building blocks for a lot of infrastructure work.
Git for version control.
curl and wget for testing endpoints and downloading resources.
jq for working with JSON.
tmux for terminal sessions.
rsync for file transfer and synchronization.
Neovim for editing config files and scripts.
Again, the basics kept showing up.
Understanding what the installer did for me
After the system was working, I started studying the manual installation process more deeply.
That changed how I looked at my own install.
Instead of thinking:
“Arch is installed, I am done.”
I started asking:
“What did the installer actually do for me?”
That question opened up the real learning.
I began reviewing manual installation concepts like:
lsblk
fdisk
cryptsetup luksFormat
cryptsetup open
mkfs.ext4
mkswap
mount
genfstab
arch-chroot
Suddenly, the installation was no longer just a finished result.
It became something I could reverse-engineer.
LUKS encryption made more sense
My Arch system uses LUKS2 encryption.
But because archinstall handled it automatically, I wanted to understand the manual flow.
The model became:
disk
→ partition
→ LUKS encrypted container
→ unlocked mapper device
That helped me understand that encryption is not just a checkbox during installation.
There is a real storage layer involved.
You format a partition as a LUKS container.
You unlock it.
Then the system sees an unlocked mapper device that can be formatted and mounted.
That layer matters because if you do not understand it, boot issues, recovery scenarios, and storage changes become much harder to reason about later.
LVM introduced another layer
This is one area I am still learning more deeply.
My current Arch setup does not use LVM.
But studying LVM helped me understand how Linux can manage storage more flexibly.
The LVM model looks like this:
Physical disk
→ partition
→ LUKS
→ LVM Physical Volume
→ Volume Group
→ Logical Volumes
Commands like these started to make more sense:
pvcreate
vgcreate
lvcreate
With LVM, you can create separate logical volumes for things like:
root
home
data
swap
The important lesson for me was that a logical volume is not yet a filesystem.
You still need to format it.
For example:
mkfs.ext4
mkswap
So the model becomes:
LVM logical volume
→ filesystem
→ mount point
That distinction matters.
Creating storage is one step.
Creating a filesystem on that storage is another.
Mounting it into the Linux directory tree is another.
Mount order matters
One lesson that really stood out was mount order.
The correct mental model is:
mount root at /mnt
→ mount /home under /mnt/home
→ mount /boot under /mnt/boot
→ enable swap
The root filesystem needs to be mounted first.
Why?
Because child mount points live under the root mount.
If you mount a child filesystem first, then mount the parent later, the earlier mount can become hidden under the new parent mount.
That was one of those Linux lessons that sounds small until it clicks.
Mounting is not just “attach this disk somewhere.”
Mounting is about building the directory tree that the system will later boot into.
/etc/fstab became less mysterious
Another important moment was understanding how /etc/fstab is generated.
The command is:
genfstab -U /mnt >> /mnt/etc/fstab
Before, I understood fstab generally as “the file that controls what mounts at boot.”
But the key lesson is this:
The filesystems that are mounted when genfstab runs determine what entries are generated.
So if you forget to mount something before generating fstab, it may not be recorded properly.
That makes the order important:
Prepare storage.
Unlock encryption.
Activate volumes.
Create filesystems.
Mount them correctly.
Generate fstab.
Then continue configuration.
arch-chroot changed the perspective
The arch-chroot step also helped the installation flow make more sense.
arch-chroot /mnt
Before chroot, you are inside the Arch ISO live environment.
After chroot, your root changes to the new installation mounted at /mnt.
The mental model became:
Arch ISO
→ prepare storage
→ mount filesystems
→ install base system
→ chroot into new system
→ configure the real OS
That made the setup process feel less mysterious.
You are not magically entering another machine.
You are changing your root environment so commands now apply to the installed system.
A better troubleshooting habit
One of the biggest habits I am trying to build from this journey is documentation-first troubleshooting.
Instead of jumping straight to random searches, the flow I want to use more is:
command --help
→ man command
→ official documentation
→ Arch Wiki
→ web search if still needed
This is important for Linux, but it also applies to DevOps, SRE, Kubernetes, and cloud work.
Good troubleshooting is not just about finding an answer quickly.
It is about understanding the system well enough to know whether the answer actually applies to your situation.
Why this matters for DevOps and Kubernetes
Some people may ask:
“Why spend time installing Arch bare metal if you want to work with DevOps or Kubernetes?”
For me, the answer is simple.
Because modern infrastructure is full of abstractions.
Cloud consoles abstract servers.
Kubernetes abstracts containers.
CI/CD pipelines abstract deployment steps.
Managed services abstract operations.
Those abstractions are useful.
But when things break, the fundamentals come back.
You still need to understand:
Storage
Networking
Processes
Permissions
Services
Logs
Bootstrapping
Filesystems
Package management
Troubleshooting
Going bare metal forces you to respect those layers.
It gives you a different kind of confidence because you are not only using a system that someone else prepared.
You are learning how the system comes together.
Where I am now
My current Arch system is installed and working.
It uses:
SSD
├── EFI /boot
└── LUKS2
     └── ext4 /
The deeper model I am currently studying includes:
SSD
├── EFI /boot
└── LUKS
     └── LVM
          ├── root
          ├── home
          └── swap
So the goal is not just to copy someone else’s setup.
The goal is to understand each layer well enough to eventually design my own setup intentionally.
That includes learning more about:
LVM resizing
Filesystem resizing
mkinitcpioBootloader configuration
Networking
Recovery scenarios
System maintenance
Final thought
I thought the biggest win would be installing Arch.
But honestly, the real learning started after the install.
The installation gave me a working system.
The review gave me understanding.
And that is the part I am most interested in building now.
Not just:
“I ran the command.”
But:
“I understand what the command changed.”
Not just:
“The system boots.”
But:
“I understand the layers that make it boot.”
If you want to become more infrastructure-ready, spend time closer to the operating system.
Break things safely.
Read the errors.
Check the docs.
Understand the layers.
Build the muscle memory.
The cloud may be where many workloads run.
But Linux is still where a lot of infrastructure confidence starts.


